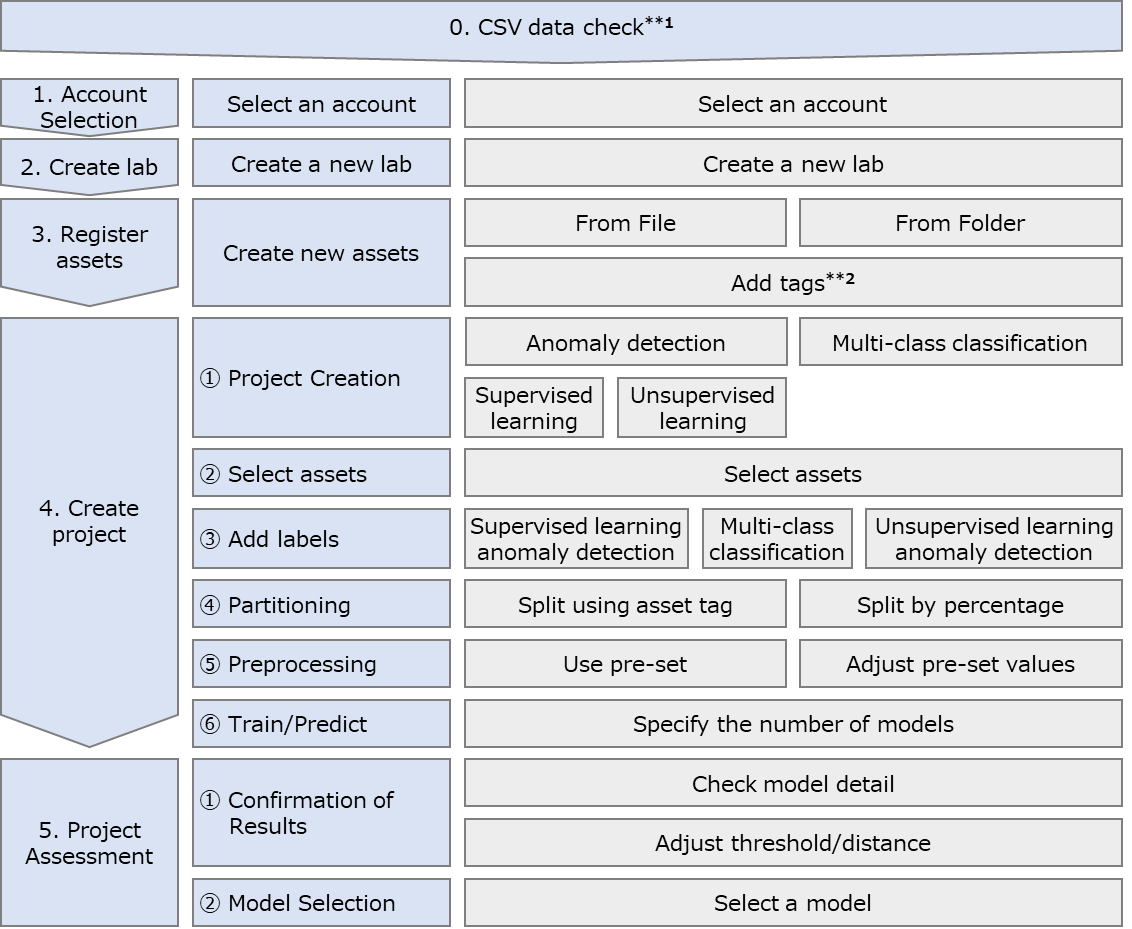
2. Let’s start MANUFACIA 1
2.1. MANUFACIA workflow
Note
Use CSV format checker. For more information, see CSV format checker user manual.
See Set tags for how to add tags.
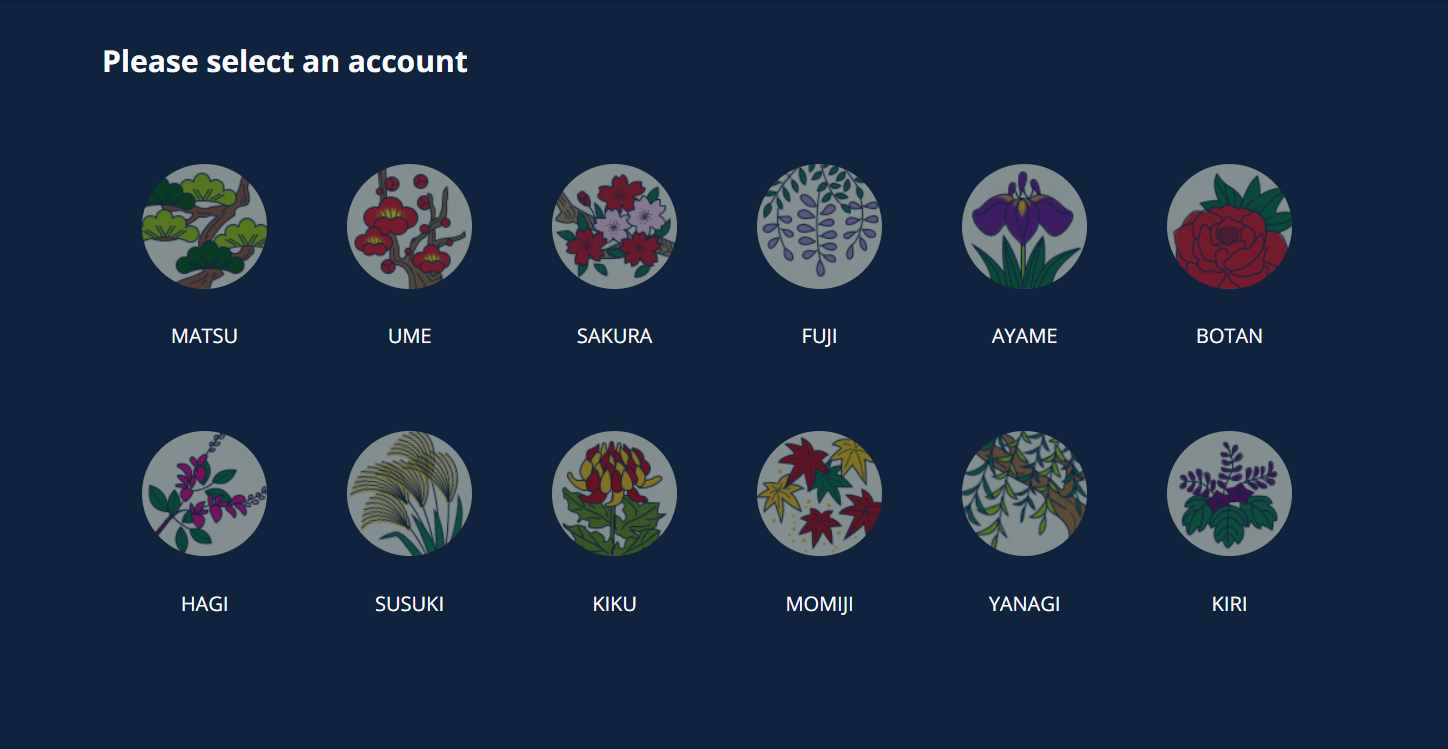
2.2. Select an account
Select one of the accounts to use.
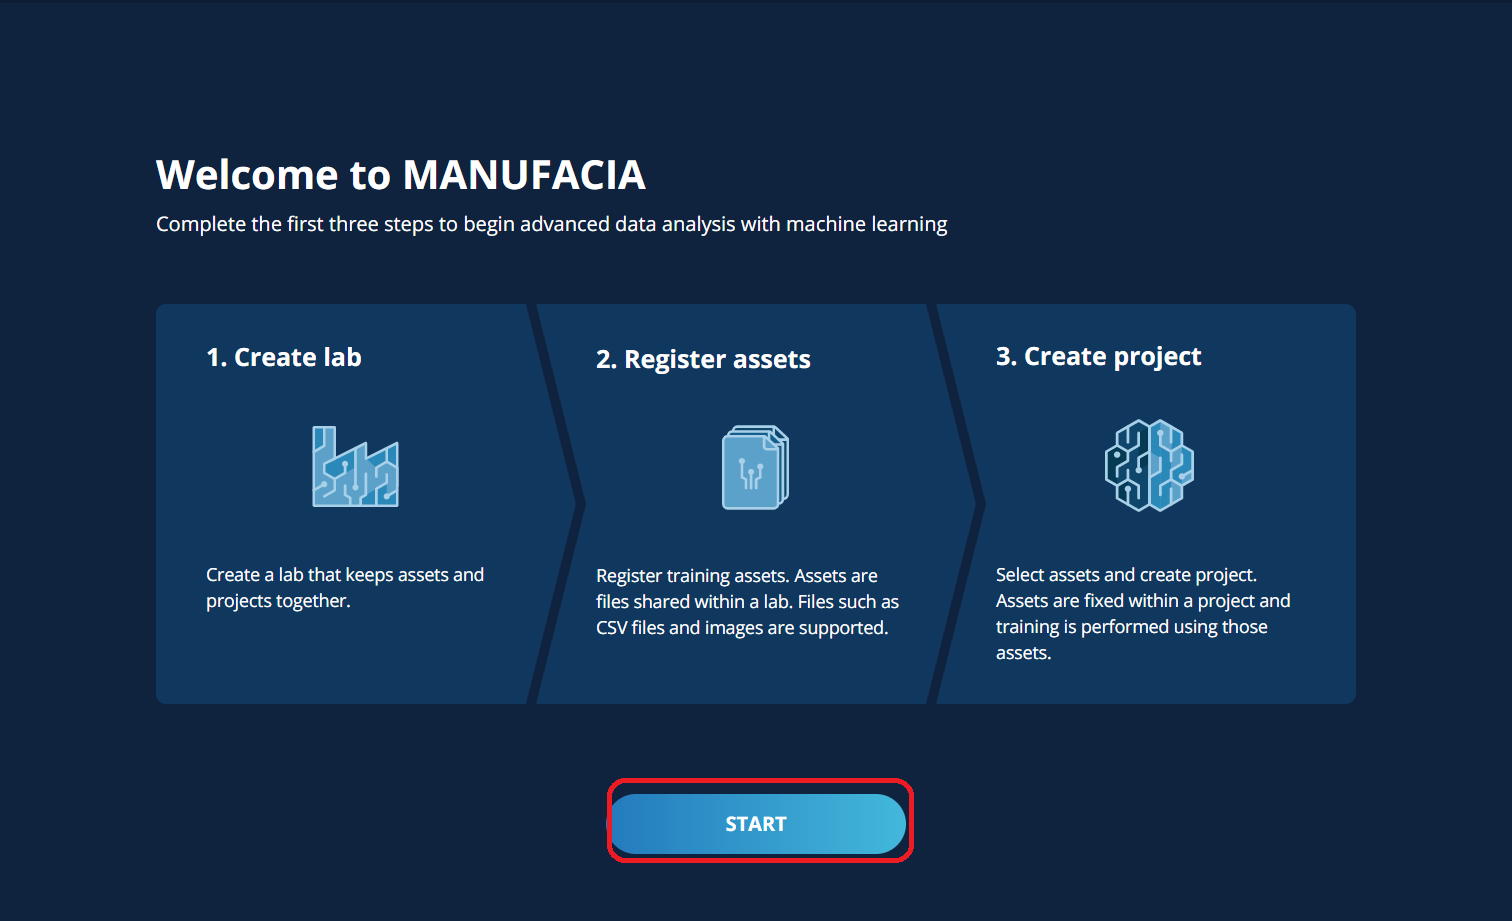
If there is no lab registered, click [START] in the following screen. If there is any lab available in the account, lab list will be displayed.
Caution
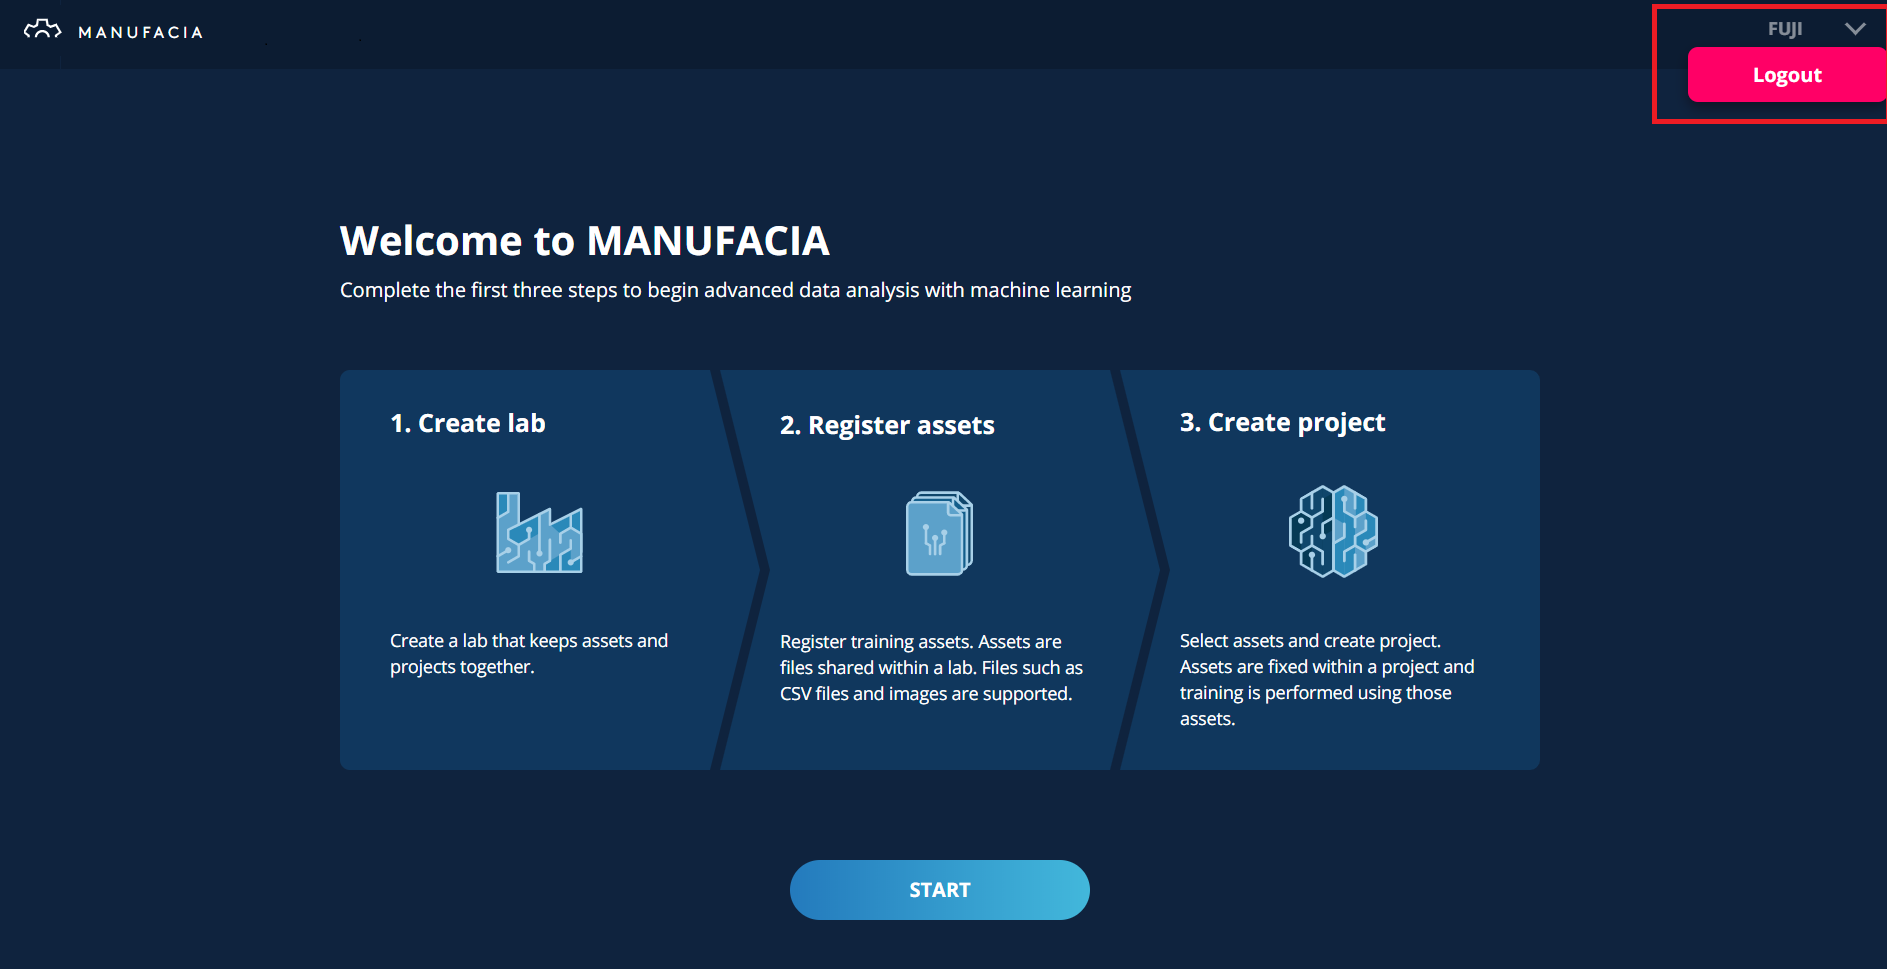
Once you select an account and create the Lab, the selected account will be used until you log out.
If you want to switch accounts, log out first and then select the one you want. To log out, place the mouse pointer over the arrow of account name on top right, then click [Logout].
2.3. Create a lab
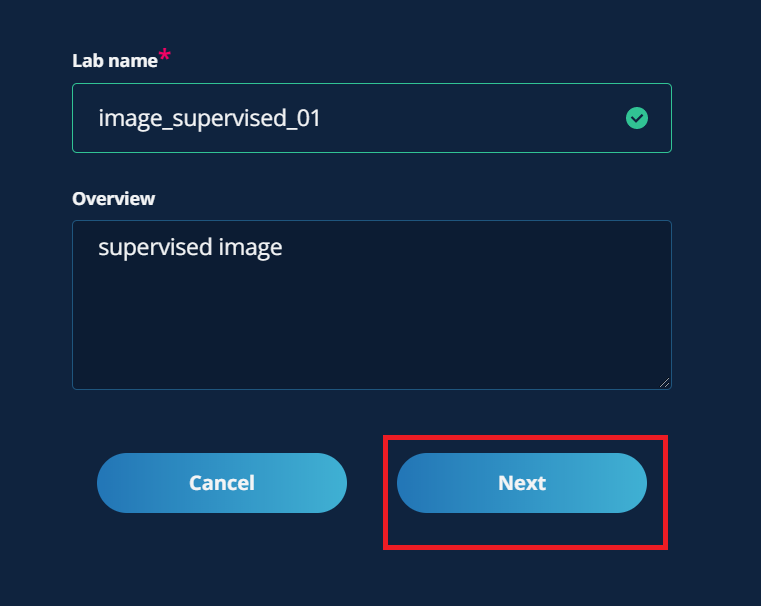
Enter the Lab name (required) and the summary (optional). As soon as the lab name has been given, [Next] button will be enabled. Click [Next] after confirming if there is no input missing.
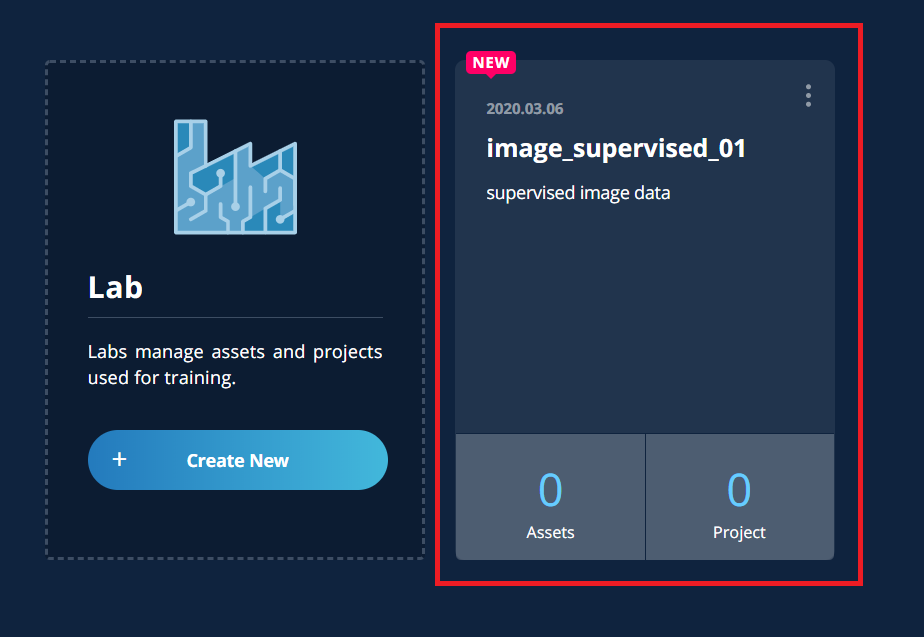
The screen automatically proceeds to the next, make sure that the Lab has been created.
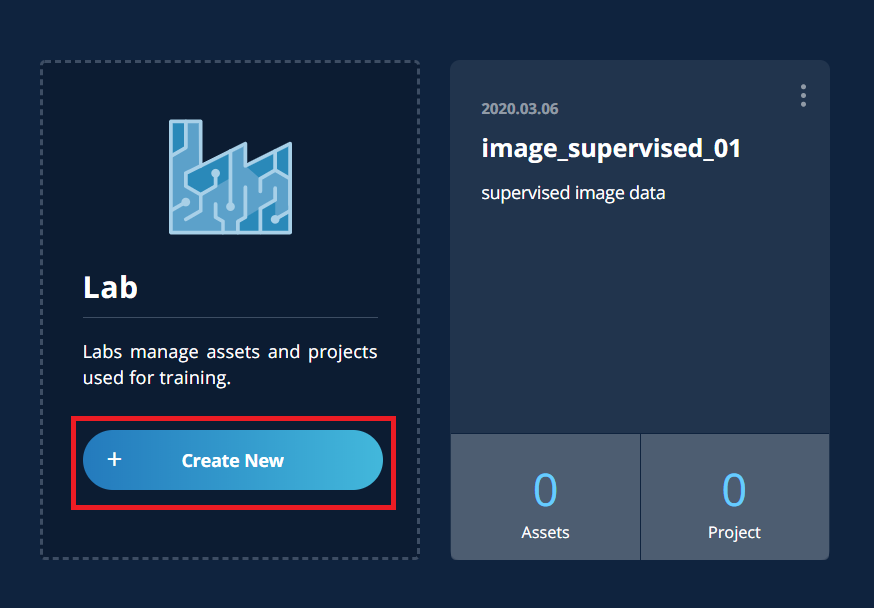
To create any further labs, just click [+ Create New].
2.4. Register assets
2.4.1. Select data files
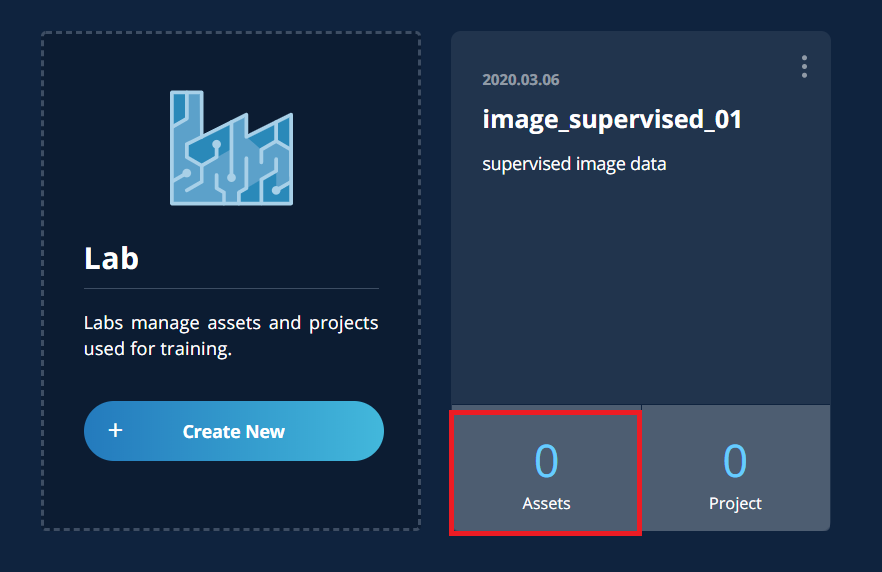
Click [Assets] of the Lab where you want to create assets.
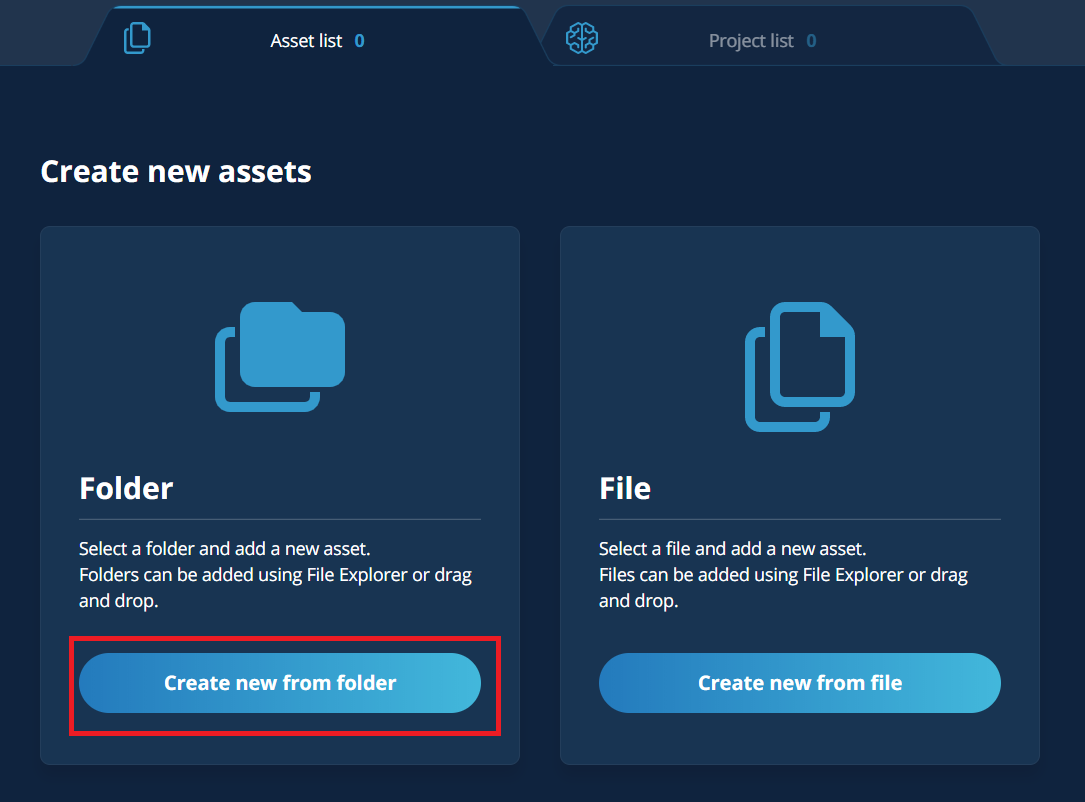
Now, we’re going to add new assets. Choose one of two approaches below, you can mix both to create the same assets.
Create new from folder
Create new from file
2.4.1.1. Create new from folder
Click [Create new from folder]
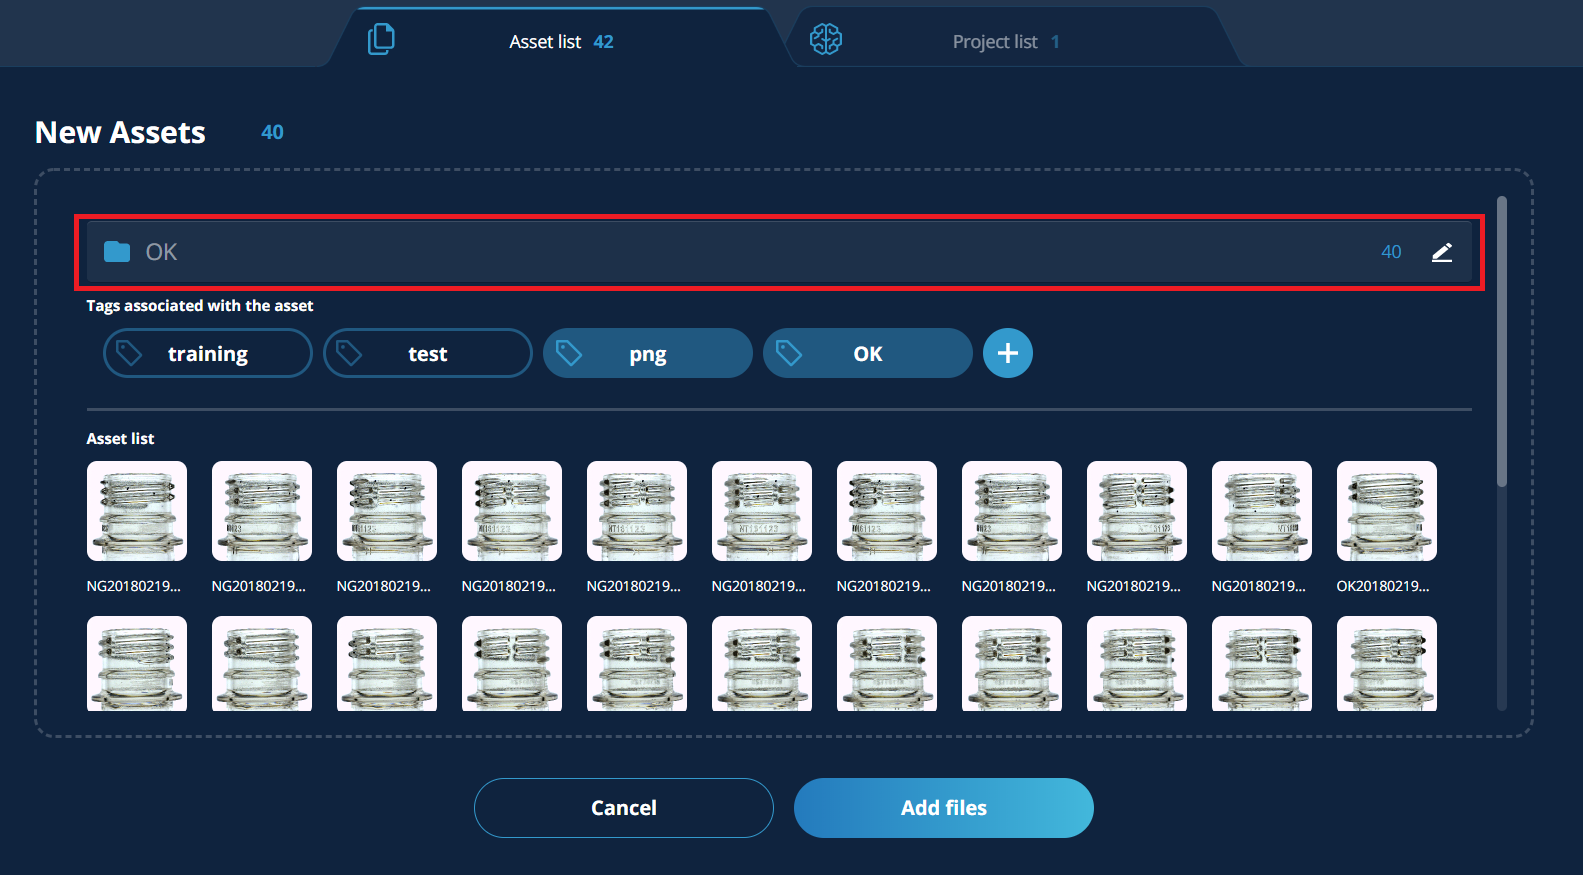
“Drag and Drop” or “Select the Folder” that you want to register.
Here, for example, an ‘ok’ folder containing 30 normal image data is dragged and dropped and registered.

The screen will automatically switch, and make sure that the drag & drop folders are displayed. The folder name and the number of files in the folder are displayed.
Caution
Once preview was displayed, tag assets correctly and press [Add files], before drag & drop the next files or folders.
If you happened to add a new folder without pressing [Add files], a new tab will be opened. Close the tab first and then go back to the tab you were working to press [Add files].
You can add more files or folders after having added files to assets.
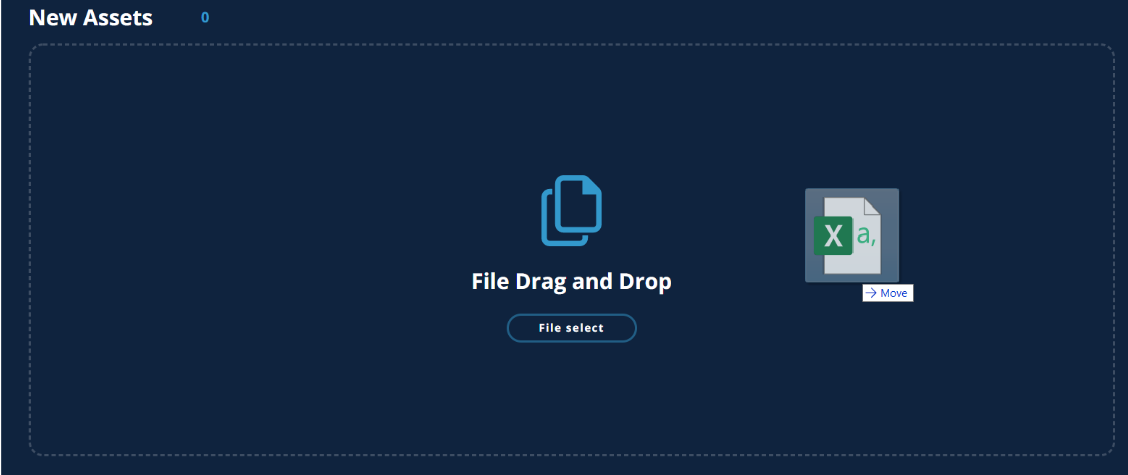
2.4.1.2. Create new from file
Click [Create new from file].

Drag and drop the file or select the file.
Here, as an example, 30 files of anomalous image data are registered by dragging and dropping. It is also possible to select multiple files at once.
Check that [New asset] shows the files that you dragged and dropped.
The number of the files that you dragged and dropped are displayed.
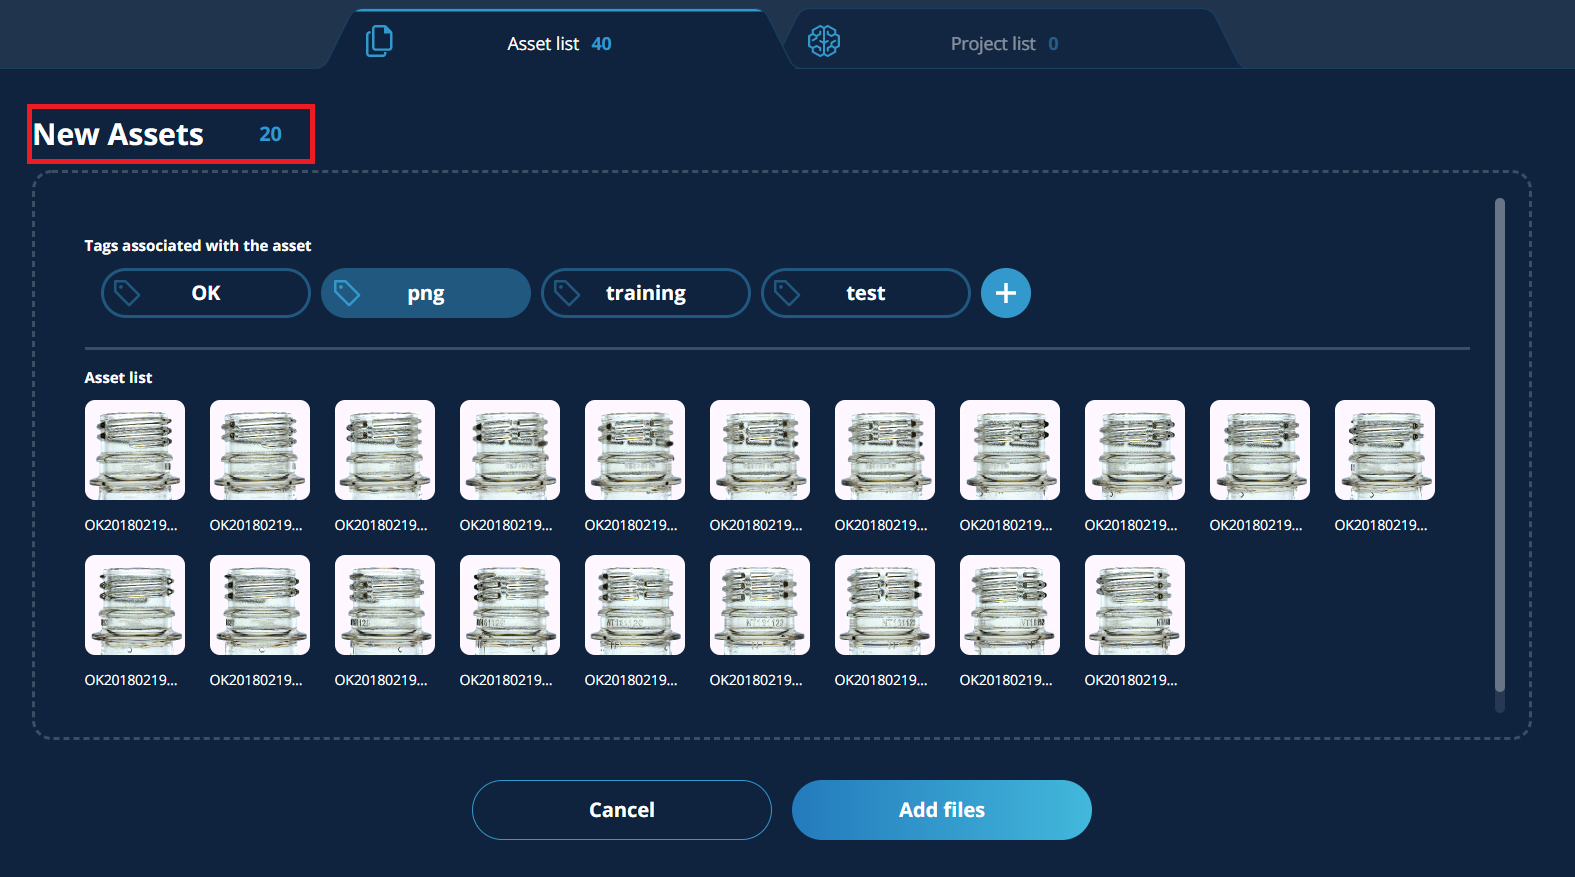
Once preview was displayed, tag assets correctly and press [Add files], before drag & drop the next files or folders. You can add more files or folders after having added files to assets.
Hint
Directory structure in the zip file will be fully ignored, its behavior is not guaranteed if there are files with the same name in different directories in the zip file.
Caution
Zip files cannot be selected with other folders. Tag will not be automatically given by the system, users have to add tag name as same as for the case to select files to create an asset.
Hint
Creating a zip file using Explorer on Windows10 default environment, file entries will be encoded in SHIFT-JIS and it fails to unzip on MANUFACIA. Therefore it fails to upload datasets. In that case, try one of followings.
Avoid using non ASCII letters for filenames.
Use zip tool such as 7-ZIP which can encode in UTF-8.
Change Windows10 system (Windows locale) setting to UTF-8. Some other applications can be affected by this change.
2.4.2. Set tags
2.4.2.3. How to set tags
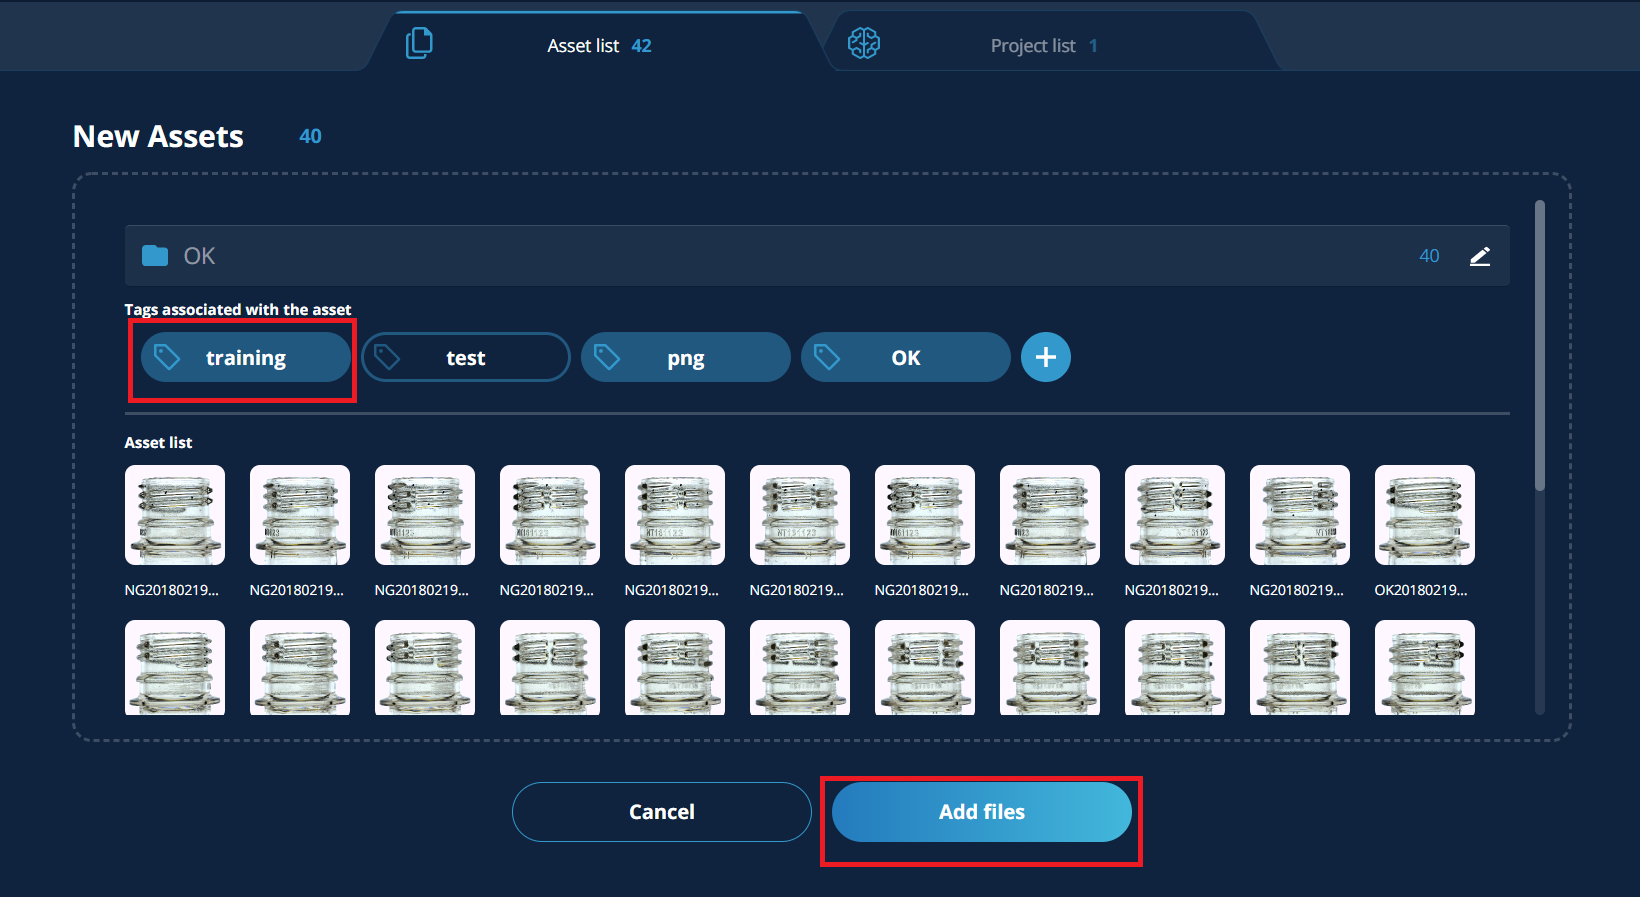
The configured tag is highlighted in dark color.
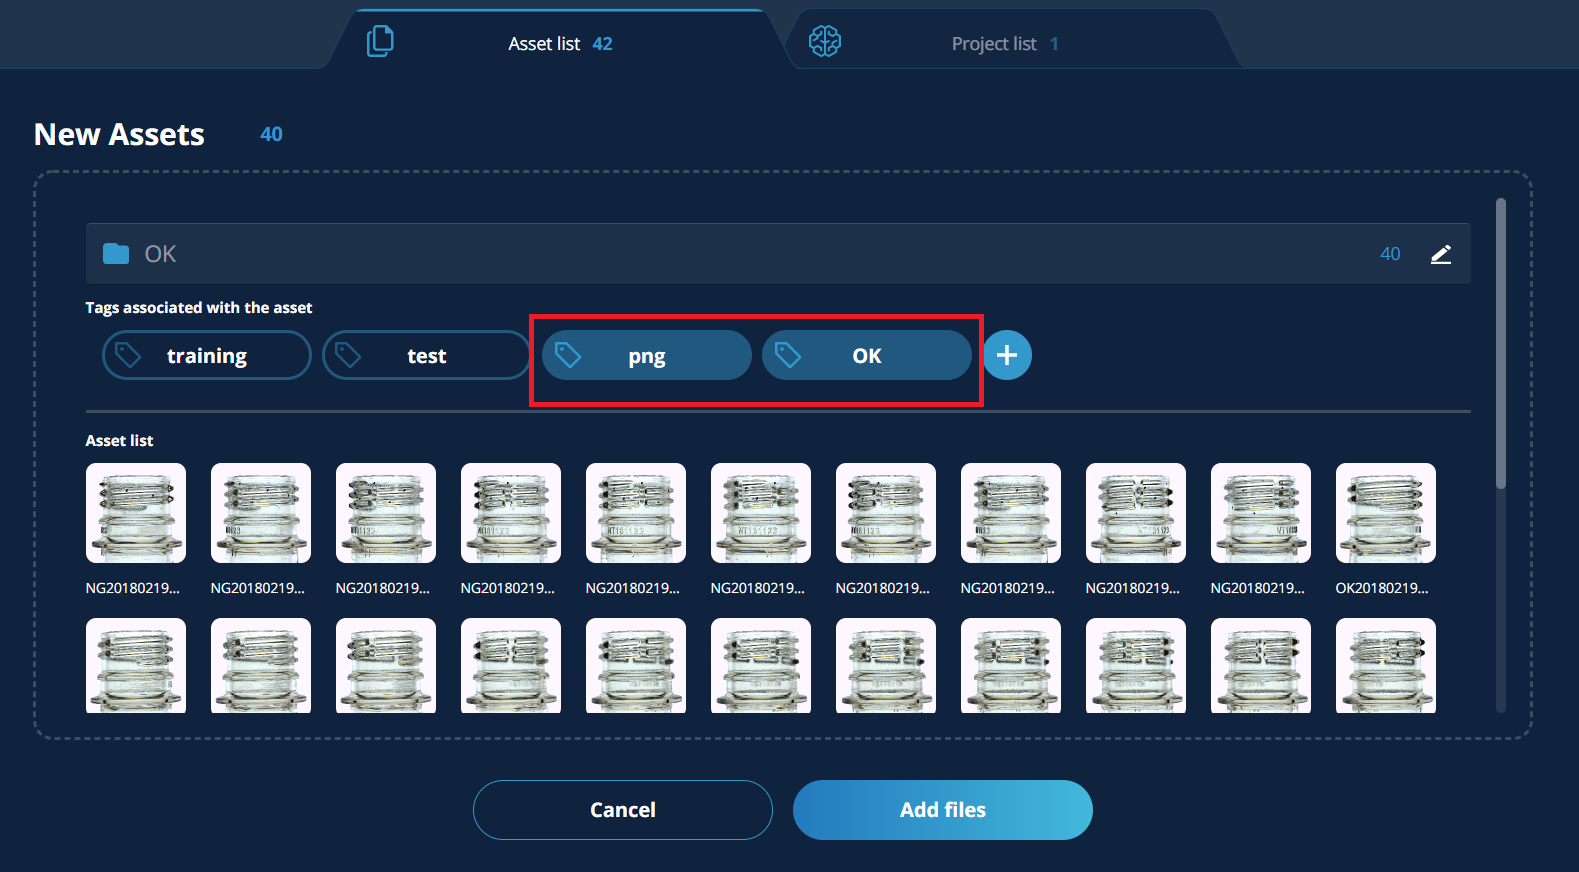
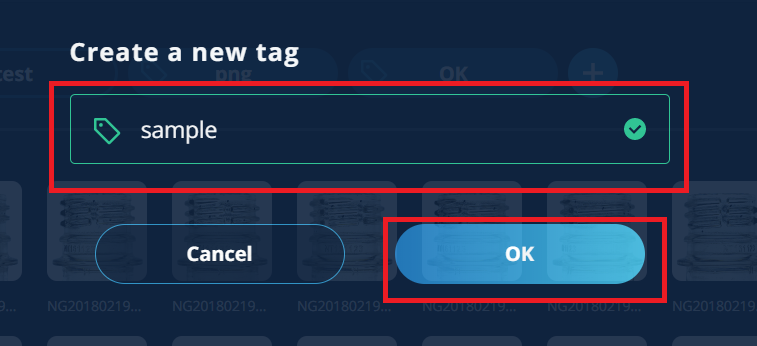
Click [+] to add a tag to the asset.

Create a new tag in need and click [OK].
Important
Once adding files to asset, the tag setting cannot be changed.
2.4.2.4. Examples of tag settings
Tag names other than prepared “training” or “test” tags may be set arbitrarily. This time, an example of “uploading an asset from a folder” and setting a folder name as a tag name is described.
Ex.1: Modeling of anomaly detection, when training data and test data are split into “percent”
Type of data |
Folder |
Tagging |
|---|---|---|
Normal data |
ok |
ok |
Anomalous data |
ng |
ng |
Ex.2: ‘Training data’ and ‘Test data’ are split using “Asset Tags” during anomaly detection model generation
Classification |
Data type |
Folder |
Tagging |
|---|---|---|---|
For training |
Normal data |
ok |
ok, training* |
For validation |
Normal data |
test_ok |
test_ok, test* |
Ex.3: For multi-class (4-class) model generation where training and test data are split ‘percent’
Data type |
Label (optional) |
Folder |
Tagging |
|---|---|---|---|
Class1 |
data1 |
data1 |
data1 |
Class2 |
data2 |
data2 |
data2 |
Class3 |
data3 |
data3 |
data3 |
Class4 |
data4 |
data4 |
data4 |
Ex.4: Multi-class (four-class) model, in which training and test data are split into “Asset Tag”
Classification tag |
Data type |
Label (optional) |
Folder |
Tagging |
|---|---|---|---|---|
For training |
Class1 |
data1 |
data1 |
data1, training* |
For validation |
Class1 |
data1 |
test_data1 |
test_data1, test* |
Note
For the “training” or “test” Tag, select the one that is prepared in advance on the Tag setup screen.
2.4.3. Add files to the asset
Click [Add files] after confirming that the file group is correctly tagged.
Here, as an example, “training” tag will be set to the asset.
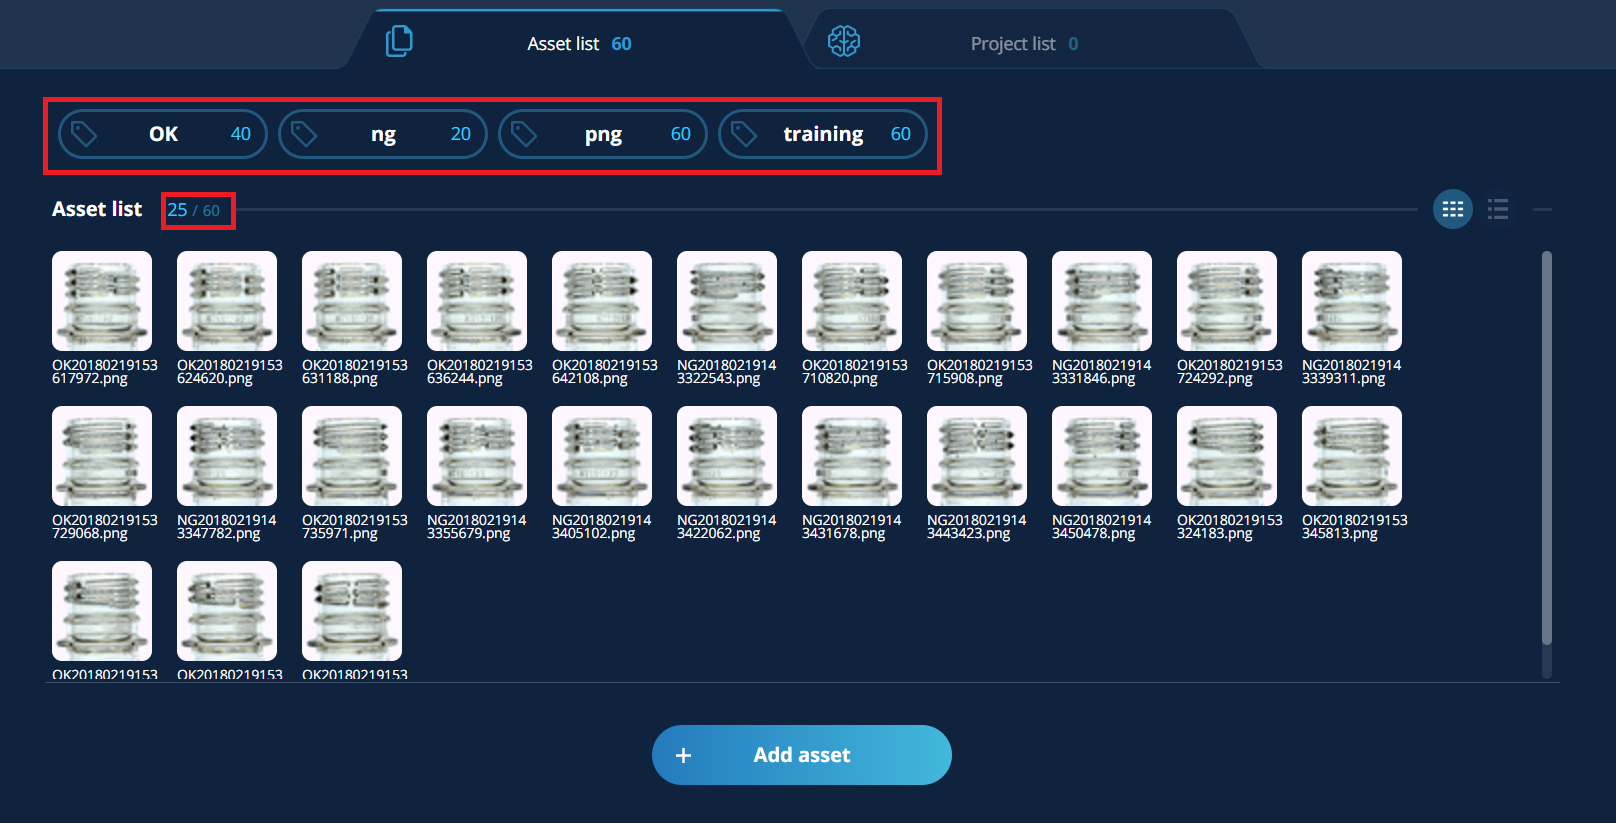
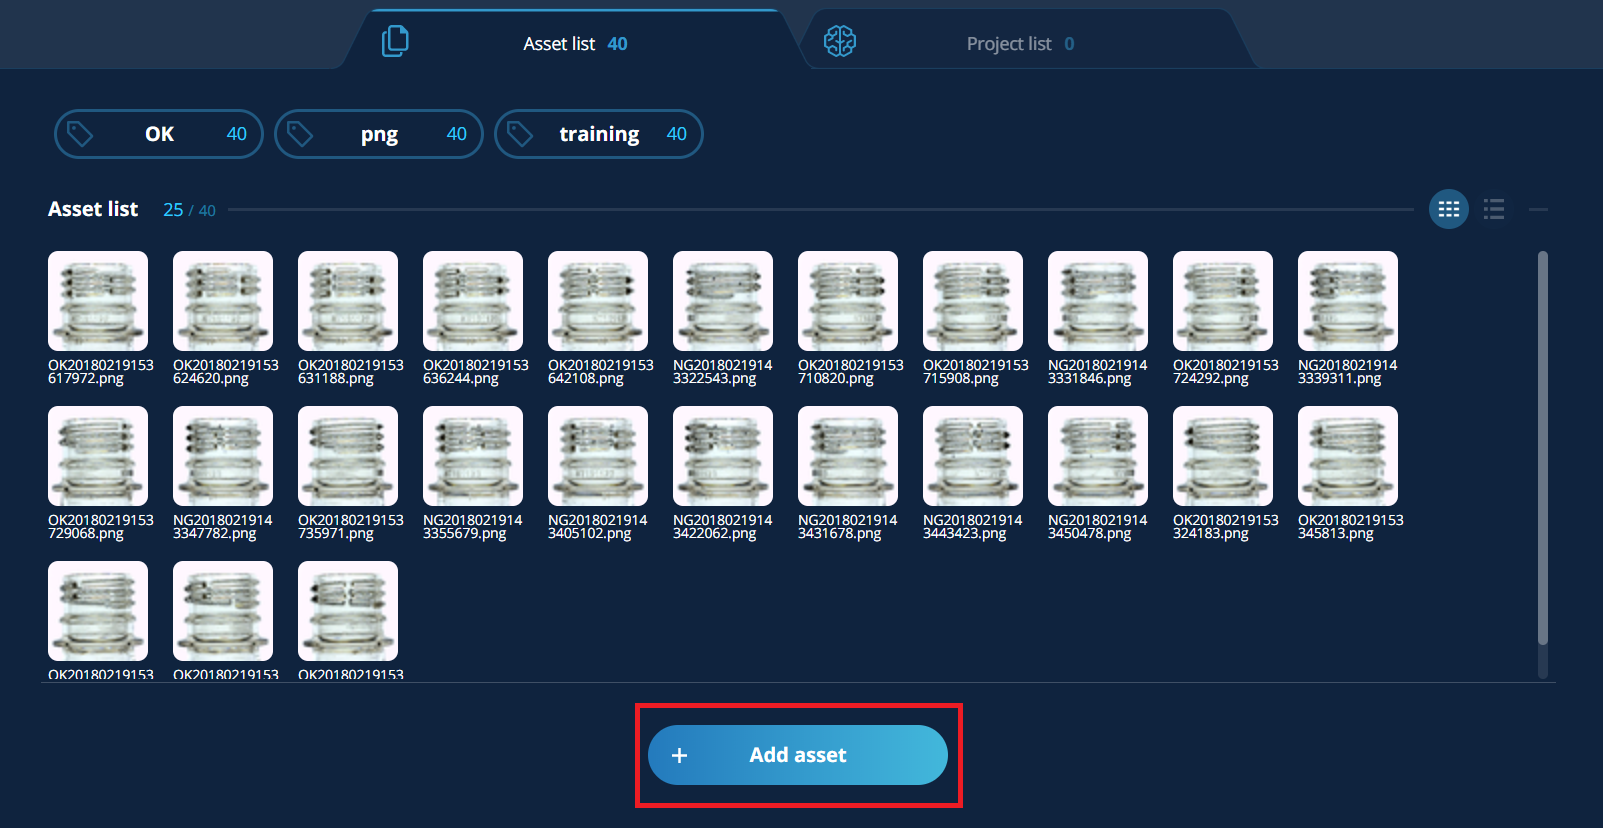
After uploading, verify that data registered in the Asset list and tag are correctly reflected. All available tags will be displayed above asset list. By clicking and selecting any tag there will only show corresponding files. By selecting more than one tag, only the files tagged for both label will be displayed.
Tip
In the Asset list, up to 1000 data are displayed. The total number of currently registered assets can be checked by the number of the denominator.
If there is another asset to add, clock [+ Add asset] and repeat the same procedure.
Important
When using CSV files, click one of the icons after pressing [Add files] to see if there is header line, and if header string is available for all columns.
This header string is used to confirm that the data of the column are the same in input files. Therefore, the training will fail, if it is not available. By using CSV format checker, the missing header line of all files can be done, or replace header string easily. See CSV format checker user manual for detail.